
So recently I have been seeing dressers and other pieces of furniture that have these cool brass fitting on the edges and around the drawers. I completely feel in love with these pieces. I guess they have been popping up on the internet and the blogisphere for some time now, I just never noticed. These pieces are called “Campaign” furniture. So the other day I was thinking, there must be a way to do these, so I found this fabulous blog with the step by step process of campaigning your furniture. So here is my step by step process.
I started out with these hideous night stands from our bedroom. Every time I hear or type the work hideous I think of that State Farm commercial…”she sounds hideous”. Well these were quite hideous. I tried painting them a year or so ago some antiqued white but they still didn’t look so hot.
 |
| The night stand even looks sad. Look at the frown. |
This time around I did some research on chalk paint. I made my own chalk paint and painted the furniture with it. More details to come on the chalk paint. I really liked using the paint and it covers the furniture soooo well. I also eliminates the need for sanding, priming and several coats of painting, which let’s face it, if I can skip out on a few steps of doing something, I will. If you haven’t noticed yet, I’m a person that loves to come up with a project and then have instant results….i don’t like waiting!
So I painted the furniture and then I did a neat little trim work around the drawers. I thought that was needed to give it a little pop of color so that it just didn’t get hidden in the room. I actually painted the entire night stand this lovely gray color and then I used a paint pen (this totally did not work, I actually used regular paint) to trim out the white. I think that worked best. I don’t have the steadiest of hands to trim out the white with a paint brush...well now I have the steadiest hand...not really.

I went to the hardware store and picked up 2 sets of corner braces and 1 set of regular braces. I actually found that Home Depot had everything that I needed, always makes shopping easy. You can go to any hardware store and they should have this stuff. I was hemming and hawing over steel or brass. Most of the pieces that I have seen used brass however; I did like the steel look too. So I finally decided on brass because it gives more of an antiquie feel plus I think that it stands out more than a steel color against the gray color. One word to the wise, measure where you want to place the braces and make sure that you are getting the right size. They offer many different sizes and you want to make sure that you are picking up the right fit. Lesson learned.

For the corner braces and the regular braces, they come with screws for you to secure them into the furniture. You can use the screws however; I wanted a something a little bit different. I decided to pick up a package of upholstery nails. They are decorative and they are so easy to work with.

The next steps are really easy. I just decided on where I wanted to place the braces and then I made sure that I measured and lined them up accordingly. Once I had the right spot, I just carefully nailed in the upholstery nails. If you have some muscles, you might be able to push the nails right into the furniture.

So this is how they came out!! What do you think?? I am so in love with these night stands now. I can honestly say that they don’t look hideous anymore…they are a thing of beauty.


Just a few more pictures because I'm in love...
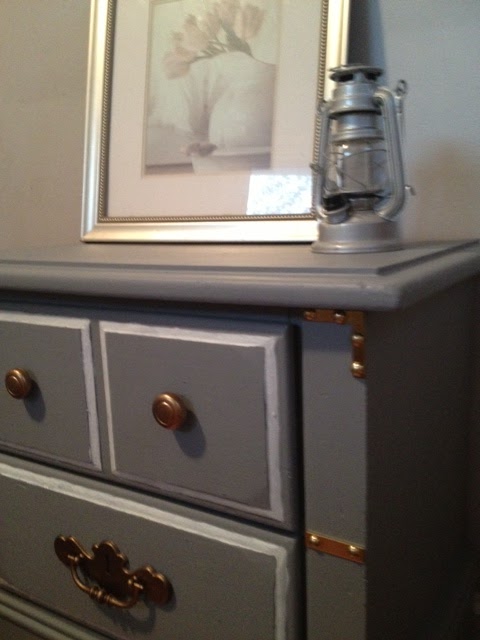
You can see that I spray painted the handle and the knobs. It was a goldish color. I might change out the knobs and get some cools ones from Hobby Lobby. They usually have their knobs and handles 50% off. I went there on Tuesday and I saw a few that I really liked. So we will see.

One quick idea, if you don’t like the brass look or the steel look, you could purchase this product called Rub and Buff. It comes in different metal finishes and you just do what the description says…rub and buff this product on. Also, if you are looks for something that has a pop of color, you could end up spraying painting the braces first and then nailing/screwing them into the furniture.
Now look at my little helper. Isn’t he soooo cute….

So I have the following coming up. This weekend we are going to start updating our kitchen. We will be installing a dishwasher, garbage disposal, new sink and countertops. I will keep you posted with our progress, but wish us luck :) Also, I will be doing a post on the paint that I used. So there is a lot more to come. Thanks for viewing my blog and it at any time you have questions/comments, please leave them for me. If you are interested in sometime in particular, let me know. I love to hear your feedback.
Thanks for viewing,
Kim
I'm linking up with...

No comments:
Post a Comment