Tuesday, October 21, 2014

Let's Wing It...


Let's Wing It...


So after a very long hiatus I have decided to try to get back into blogging.  I know that you guys were wondering where I have been and waited on baited breath to hear my next DIY project...right?!  Well, so many changes have happened in the last year.  I picked up a part time job along with my full time job.  My baby is a teenager and extremely busy and probably the most life changing news this year was my dad was diagnosed with Stage 4 Melanoma.  He went through brain surgery, gamma knife radiation and 2 rounds of treatments.  He will be starting his next round of treatment next week.  We are very prayerful that this round will be the last and that his tumors will vanish...
 
 
So over the past year I have done sooooo many DYI projects and soooo many changes to my house.  I'm still glad that I can write about them since my husband hasn't killed me yet.  So hopefully (I'm crossing my fingers) that I will be able to keep this going for a while and keep you guys in on a little snippet of my life.
 
 
Okay on to the project...Don't you want to add this to your bedroom...
 
 
I really wanted to change up my bedroom and make a little bit of a dramatic look without breaking the bank.  I decided that it was finally time to add a headboard to our bed.  It was definitely missing something for a very long time.  Again, I wanted something dramatic, something really refined and elegant so to speak.  I've seen many different headboards on pinterest and I always came back to the tufted headboard.  I absolutely love the look of the tufted headboard.  There is just something about it...
 

So I started my search on pinterest, of course, to find a DYI tufted headboard that wasn't going to be too hard for the undertaking.  I found two that I really loved.  I decided to morif these two together.  The first one I loved because the tufting was so simple and the second I loved because of the "wings".  Wings and Tufting...you can't go wrong!


So here is how i accomplished my Winged Tufted Headboard...
 
You will need the following...
1 piece of 1/4 in. plywood - 4ft x 5ft (queen size)
2 yards of 1 in. foam/batting
2 yards of 1/2 in. foam/batting
3 yards of upholstery fabric/duck cloth
staple gun
1/4 wood screws
#10 washers
1/4 washers
glue gun
drill
2x4x8 piece of lumber
flat brackets
 
I was actually really lucky and I found a piece of 4x5 plywood in my shed.  I think that it was totally meant to be for my headboard.  If you don't have a piece laying around in your shed, you can get a piece at either lowes or home depot.  I've always had great luck at HD with cutting my wood for me.  The hard part with that size wood is that it isn't easily transported in a small car like mine.  So I was really excited when I found this piece in my shed.
 
Next you will need to purchase some foam and fabric for your headboard.  I went to Joanns and got these supplies.  I waited until their duck cloth was on sale for 60% off.  Joanns does this every so often so keep a look out for this. I was ever so happy with the duck cloth.  It only comes in solid colors but it was exactly what I was going for.  You can do regular upholstery fabric but sometimes this can get quite pricey.  You will also want to pick up your foam at Joanns as well, at least this is what I did.  Again, you will want to look out for their sales.  I got mine while it was 50% off.  That is the best way to go.  You can purchase foam or if your like me, you can purchase batting, which was a lot cheaper.  Foam is soooo expensive. I purchased both 1 in and 1/2 in. and I felt that the combination was sufficient.
 
Okay, now to the construction part.  First, I laid out the plywood and got my hot glue gun ready.  I glued the heck out of the plywood and then carefully placed the batting.  I then glued the batting and placed the other batting on top of that.  Don't worry too much about the edges right now.  You don't want to cut them off just yet. 
 
Next, you will need to place the fabric on top of the batting.  You need to be precise at this point. Before you start with the staple gun and stapling the fabric you will need to start with the tufting.   I used the following blog for the instructions.  She had a great tutorial and I found that this worked the best for me.
 
 
You will want to measure out where you want your tufts to go etc.  I did only 3 rows with 4-5-4.  To me that looked the best, plus it was easy.  

Just a word of caution, if you plan do to this on your nice laminate floor, make sure that you have something underneath that beautiful floor or you might end up drilling holes in your floor by accident...I wouldn't know anything about that one...UGH!!!!
 
 
Now you will need to use your staple gun.  I actually love using this thing so it was kinda of fun for me.  You will need to flip your plywood over and start at the middle of one of the sides and start stapling away.  You will probably need to staple once every 6 inches or so.  Once you get near the corners you will need to stop and start again on the next side.  I recommend waiting to do the corners last.  You want a nice clean edge so to speak, kinda of like wrapping a Christmas present. The nice thing working with the staple gun, is you can always take the staple out and try again especially if your edge/corner doesn't look the way you want it to.  Also, while you are folding the fabric over, you will be able to fold the batting at the same time.  You want this tight so that you can get the best tufts possible.   
 
Once that is completed you can purchase a handy dandy button kit for the areas that were "tufted" or feel free to purchase some cute buttons.  Whatever works best.  I used the button kit and then hot glued them on.  It was very easy.  I got the button kit at Hobby Lobby. 
 
Next is when I added the wings.  I feel that really set the headboard.  I first added batting to the 2x4s and then added the fabric.  I used this great blog to figure out how to wrap the fabric around the 2x4.  You want to make sure that the tops look good and I folded it over a few times to finally get the look that I was going for.  Sarah Dorsey had a great tutorial about adding the wings... 
 
 
Once the wings were upholstered, then I added to the actually headboard.  I made this quite simple.  I just used some brackets and screwed them in.  I added 2 to each side.  

Once that is done, then you are done!!  You end up with a beauty like this...
 
 
I am totally in love!!! Thanks for reviewing and let me know if you have any questions. 
Kim
Friday, May 17, 2013

Come Knock on my Door...


Welcome Spring!  Spring has definitely sprung in my neck of the woods and I am loving it!  We have had constantly warm weather and some beautiful sunshine.  This project has been inspired by the spring.  I have been wanting something to do on my door for some time now and I think that this is a perfect fit.  So let’s begin…

You will need the following supplies:

1 wood block one size bigger than your glass frame

1 glass frame

2 eye hooks

Some chain

Mod-podge

Scrap book paper

Upholstery nails/decorative nails


I first started out with great picture frame and I really wanted to incorporate this into the project however; this was an epic fail.

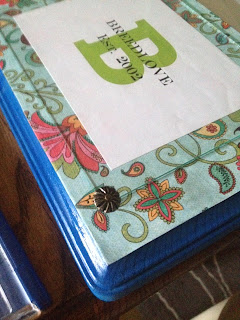
So first you will start with the wood block.  I purchased mine from Hobby Lobby.  I liked the fact that it already had some design to it and since this was going on my front door, I really wanted it to stand out.  The first thing I did was spray painted the wood.   I made 2 of these, one for my front door and one as a wedding gift.  The one for the wedding gift I spray painted white, since I didn’t know their colors.  For mine, I spray painted it a vibrant color to make it stand out against my ugly front door (eventually I will be painting it!)

Once the spray paint dried, I then picked out some really pretty scrap book paper.  Here is where you can get creative.  I wanted something that reminded me of spring, hence this really pretty paper.  When I see it, it really makes me smile.  I then traced the wood around the back of the scrap book paper and cut it to size.  I then mod-podged the wood and placed the paper on there.  I also mod-podged the top of the scrap book paper to give it a glossy feel.  I just realized that mod podge comes in many different finishes.   I have the finish that is glossy but you can purchase matte etc.

Make sure you wait for the glue to dry before you do the next step.  I did not and of course I ran into a few problems.  You already know my hasty problem.  So once the glue is fully dry (you could let it dry overnight, just to be sure) you will start placing the glass frame on top of the wood frame.  Just a note, I got one of my glass frames from the Dollar Tree and the other one from Goodwill.  I know that I didn’t spend over a dollar for each of these.  I just used frames with nice glass and just removed the glass.  I will probably use the frames for another project, which will be an added bonus.  Once you have the glass positioned where you want it, you will start GENTLY hammering in the upholstery nails (if you did the last post that I posted, you should have a few of these left over.  I love when things work out that way J) to hold the glass into place, plus give it an added decorative element.  I did 3 sides at first and kept one side open until I placed the paper under the glass.  Make sure that you keep at least 1 side open, you might want to keep 2 sides open so that the paper will slide in easily and you can move it around some to get the exact place that you want it. 

Now here comes your creativity.  The 2 that I made were front door name plaques however; you could place a saying here or maybe a no solicitation, the possibilities are endless.  I love tapping into my creative side.  When I was creating mine, I used Publisher and I automatically set the page size to the size of the glass frame so that I was making sure that I wasn’t going over the size etc.  Once you have come up with what you wanted, you will then print it off.  You can print on nice paper or you can be like me and print on regular paper.  You might be able to print on scarp book paper; whatever works. 

Once you print it off, then you just set it behind the glass.  Make sure that you arraign it before you nail in the last few nails.  If not you will not be able to move the paper around.  Again, make sure that you are really gentle when you are tapping in the nails or else you will break the glass and that can get really messy J

So you are almost done, are you excited!!  The next thing that I did was place some eyelit hooks in the top of the wood frame.  I made sure that these were evenly placed at the top.  I used 2 at either end of the wood frame.  I then hooked some left over chain that I had from a previous project.  If you don’t have any chain, then you can hit up the local craft store and purchase from chain in the jewelry department.  I used a jump chain to hook the chain to the eye lit hook.  Now, the final step, hanging it on your front door.

So what do you think…

 
While I was posting this, I was thinking that it would be cool to use glass paint and make some really cool design or you could use a dry erase marker so that you could be able to constantly change the information. 

Also, do you love the "hello" that I painted on my front door.  Now I have two things that make me smile when I come home.  The "hello" thing is something that I saw on Pinterest and I just had to try.  I knew I was re-painting my front door, so if this was a bomb, I could quickly cover it up.  Needless to say, I love it and I still haven't painted my front door.

Please let me know if you have any questions.  I also would love to see what fabulous ideas that you come up with!!  Have fun and enjoy this wonderful spring weather.

Linking up with


Friday, May 10, 2013

Campaigning...I vote yes!!

So recently I have been seeing dressers and other pieces of furniture that have these cool brass fitting on the edges and around the drawers.  I completely feel in love with these pieces.  I guess they have been popping up on the internet and the blogisphere for some time now, I just never noticed.  These pieces are called “Campaign” furniture.  So the other day I was thinking, there must be a way to do these, so I found this fabulous blog with the step by step process of campaigning your furniture.  So here is my step by step process.

I started out with these hideous night stands from our bedroom.  Every time I hear or type the work hideous I think of that State Farm commercial…”she sounds hideous”.  Well these were quite hideous.  I tried painting them a year or so ago some antiqued white but they still didn’t look so hot. 


The night stand even looks sad.  Look at the frown.

This time around I did some research on chalk paint.  I made my own chalk paint and painted the furniture with it.  More details to come on the chalk paint.  I really liked using the paint and it covers the furniture soooo well.  I also eliminates the need for sanding, priming and several coats of painting, which let’s face it, if I can skip out on a few steps of doing something, I will.  If you haven’t noticed yet, I’m a person that loves to come up with a project and then have instant results….i don’t like waiting!
So I painted the furniture and then I did a neat little trim work around the drawers.  I thought that was needed to give it a little pop of color so that it just didn’t get hidden in the room.  I actually painted the entire night stand this lovely gray color and then I used a paint pen (this totally did not work, I actually used regular paint) to trim out the white.  I think that worked best.  I don’t have the steadiest of hands to trim out the white with a paint brush...well now I have the steadiest hand...not really.


I went to the hardware store and picked up 2 sets of corner braces and 1 set of regular braces.  I actually found that Home Depot had everything that I needed, always makes shopping easy.  You can go to any hardware store and they should have this stuff.  I was hemming and hawing over steel or brass.  Most of the pieces that I have seen used brass however; I did like the steel look too.  So I finally decided on brass because it gives more of an antiquie feel plus I think that it stands out more than a steel color against the gray color.  One word to the wise, measure where you want to place the braces and make sure that you are getting the right size.  They offer many different sizes and you want to make sure that you are picking up the right fit.  Lesson learned.

For the corner braces and the regular braces, they come with screws for you to secure them into the furniture.  You can use the screws however; I wanted a something a little bit different.  I decided to pick up a package of upholstery nails.  They are decorative and they are so easy to work with. 


The next steps are really easy.  I just decided on where I wanted to place the braces and then I made sure that I measured and lined them up accordingly.  Once I had the right spot, I just carefully nailed in the upholstery nails.  If you have some muscles, you might be able to push the nails right into the furniture. 


So this is how they came out!!  What do you think??  I am so in love with these night stands now.  I can honestly say that they don’t look hideous anymore…they are a thing of beauty.

Just a few more pictures because I'm in love...


You can see that I spray painted the handle and the knobs.  It was a goldish color.  I might change out the knobs and get some cools ones from Hobby Lobby.  They usually have their knobs and handles 50% off.  I went there on Tuesday and I saw a few that I really liked.  So we will see.


One quick idea, if you don’t like the brass look or the steel look, you could purchase this product called Rub and Buff.  It comes in different metal finishes and you just do what the description says…rub and buff this product on.  Also, if you are looks for something that has a pop of color, you could end up spraying painting the braces first and then nailing/screwing them into the furniture.        

Now look at my little helper.  Isn’t he soooo cute….

So I have the following coming up.  This weekend we are going to start updating our kitchen.  We will be installing a dishwasher, garbage disposal, new sink and countertops.  I will keep you posted with our progress, but wish us luck :)  Also, I will be doing a post on the paint that I used.  So there is a lot more to come.  Thanks for viewing my blog and it at any time you have questions/comments, please leave them for me.  If you are interested in sometime in particular, let me know.  I love to hear your feedback. 

Thanks for viewing,

Kim

I'm linking up with...


Friday, May 3, 2013

I Did It! I Did It! My Very Own Sofa Table!


Hello Everyone, I hope that your week is going fabulous.  I have had a fantastic week. Work has been really awesome and things are starting to fall in place.  I love that feeling.
So last week after seeing a few pinterest ideas, I decided that I would try my best to create a sofa table for my living room.  Now, I bet your saying…"Kim, there is no way possible for me to create a sofa table or for that matter any table, I don’t have the skills nor the tools to do that.”  I felt the same way for the longest time.  I thought, I could never do something that involved that acquired that much skill and ability.  I was actually wrong. So this blog is really about using the items that you have and really taking a chance to see what you can create :)  I only used the items that I already had in my garage and I didn’t use any big expensive tools.  So I will show you what I did to make this awesome/functional sofa table…
 
So last week I was walking to my kitchen and spotted these legs in my garage, it was one of the corner of the eye moments.  If you have ever had one you will know what I mean.  Anyways, I was like, hmmm, I think I could make a sofa table out of these.  Now, these legs actually came off of an over the toilet cabinet that we never used.  I actually used the cabinet as craft storage and I didn’t need the legs.  These totally came in handy. Now if you don’t have legs, then my suggestion would be to just use some 2x4 for the legs.  So, this project all started with the legs.
  

Look at that dark dingy basement :(

 
Here we go…
What you will need:
                3 – 1x8 pine boards cut into 4 ft
                4 -  "L" brackets/corner braces
                4 – Mending Plates
                Stain and/or paint of your choice
1.       I found some 1x8 in the garage. These were already cut down to 4 feet.  I was going to use them for board and batten look in my bathroom but I went with something different. Anyways, you will only need 3 boards cut into 4 feet.  You can have your big box stores cut them for you.  That makes life so easy ;)
2.       Then I lined up my boards, I used 3 boards.  I didn’t want to make it super wide because I was only working with a same space.  You could use more or less depending on how wide your legs are.  I used these wonderful things called ____________ to secure the boards. I know that probably carpenters are not using these but hey they work and they are super easy.  Make sure that you secure them to the back side of the wood.  I only had to use 4.
 
3.       Once you have the boards lined up and you have secured them together, now you want to secure them to the legs.  I used these lovely things called “L” brackets or corner braces.  These too are great to have in your arsenal.  I have used them for so many things. Now, turn your piece over and secure them to the boards and to the legs. Make sure that everything is lined up the way that you want it before you start screwing in the “L” brackets.
   
4.       Once these are secure you are almost done.  Yeah!!  At this point I realized that the frame work for the sofa table wasn’t really that sturdy.  I was going to be placing some lamps and pictures and other things on there and I really didn’t want them to wobble.  Also, I don’t have this right behind my sofa (so I’m not too sure why I’m calling it this but anyways) and I didn’t want anything to come crashing down.  If everything seems secure enough for you, then you don’t need to do these next steps okay. 
You will need to create a brace towards the bottom of the table to keep everything really secure.  I took 2 pieces of the same wood.  I decided to place them on top of the support for the legs.  Wait…that was my intention, but you will see later that I really messed that part up.  Anyways, I needed to notch out a section of the wood in order to do this.  I used a jig saw but if you don’t have a jig saw – no worries, you can use a regular old saw :)  Also, I only had to do this with the legs that I was using.  You might not have to do this if you are using regular 2x4 or some other type legs.  Once I had them fitted to the way I liked then I screwed them right into the leg supports.  You can see in the pictures where I messed up.
 
5.       Once the table is constructed to the way you like it, now here is the fun part.  You can paint it or stain it.  I bought this small tube of gel stain from Hobby Lobby and I used a rag and stained the top part. You don’t need to the underside because no one is going to see it.  I then used some black acrylic paint for the legs. These were already painted white and I wanted to see how the black would look if I used a rag to wipe it on.  It kinda of looks like they are metal now.  I really, really love the way they look now. 


6.       Now the even funner (fyi, I know that is not a word) part, now you can decorate it and place some of you really cool finds and a lamp or too on it.
 
7.       Lastly, you can sit on your couch with a half ice tea/lemonade combo and marvel at the great work that you did and think…wow I did this, what more can I do…


**do you love the mail letter holder, I got this for $2 at Goodwill, I can't believe someone donated that beauty :)  Also, check out the big die that I made, <3 that too!!
I hope you enjoyed this post.  I wanted to really show you that I can build something with the materials you might already have.  I also wanted to demonstrate that you have the skills to build these things.  I always thought that my skills were nowhere near ever creating something like this but you all have the skills and abilities.  I hope that this has encouraged you to see what you can create.  I would love to make a dining room table or maybe an outdoor table.  We will see… Please share any ideas or if you create something similar, I would love to see what you create :)

I'm Linking Up with....


Thursday, April 18, 2013

Fabulous Pendant Light under $20

First and foremost I am so sorry that I haven't not written a post in like....FOREVER!!! I know that all of you have been waiting on batted  breath for my next post well here we have it... This is a good one too  and I'm super excited to share this one with you. So enough with the theatrics, I will get to the post.
I created a pendant light for my hallway for less then $20. I'm not joking and it looks super cool and super high end minus the super low end pictures taken with my iPhone. Anyways...I spotted this lovely wooden stick orb thing at Goodwill the other day.

I was so shocked to see something this good for $2 there. That's right, I said it $2 smackers. I have a picture to show you, just so you know I'm not lying. Anyways, I picked it up with no real thought at first with what I was going to do with it but I knew that I needed it ;)

 Fast forward to a few days and while I was surfing through Pinterest (I know, I know, you would've never thought that about me) I stumbled over this picture and thought, hey maybe I could use that orb stick thingy.
Light on Pinterest unfortunately there was no website associated and therefore I can't give credit.  Sorry.  If someone knows who this belongs to please let me know and I will give credit where credit it due.

So I did some research online and found out that Home Depot has a Pendant Lighting Kit, just what I needed. It wasn't too overly priced but I little more than I like to spend.

But anyways, I picked it up. That night I started the process of assembling this light because it was sooooo labor intensive...just joking, took all of 2 minutes to find the perfect spot for the light to fit in the orb.


 So the next day my great husband then helped me out a little bit(probably big bit) by taking the old light down and installing the new light. First we figured out how long we wanted the wire to be. We had to cut quite a bit off, which is fine but save at least an extra 6 inches for wiring the sucker into the wiring harness.  We had to do some playing around with the nut that holds the wire in place but once we got it off it was smooth sailing. We then, I mean he then rewired the electrical to the old hallway light.  (As I'm writing this post, I forgot to take a picture of the not so pretty light that was previously there...ugh). So this is what it looks like... What do you think??  Again, the pictures aren't the best but it still looks amazing...


Total breakdown for this project:
Orb: $2
Pendant light kit: $14.95
Total: 16.95

So there you have it. A gorgeous pendant light for less then $20 and about 20 minutes of your time.


Also, quick sneak peak of my dining room.  It has taken me a few months but it is almost there.  I am sooo happy with the way that it turned out. I added the chair rail, baseboard, and the picture frame molding.  I also painted it too. I just need to add some more décor items and then its done.  Please don't mind the random clutter on the table :)


I'm linking up with...

Tuesday, December 25, 2012

Merry Christmas!!


Merry Christmas!!


Merry Christmas Everyone!!  Sorry for not blogging as often as I should.  My life has been crazy and I know that yours has been too!  So I finally arrived at my parents for Christmas.  A few years ago they moved to a smaller town in Virginia.  It is absolutely a beautiful town that kinda of reminds you of the old Christmas towns that you see in those Christmas cards, so nostalgic.
 
Anyways, this morning I was the first one up and got my cup of coffee with Pumpkin Spice creamer (oh, how I love that creamer, sometimes I’m half tempted to drink it out of the container).  I sat on my parents couch and I was admiring their Christmas tree.  I started looking at the ornaments and was reminded of Christmas’ past.  My eye finally came to my favoritest (I know that’s not a word) of all!  It is a clay duck that we made when I was in kindergarten.  The ornament is painted a copper color and it’s scribed with my name on the front and my kindergarten school picture on the back. 

This ornament has standed the test of time.  It is now over 25+ years old and it still glistens just like I remember it when I was 5 years old.  I don’t know why it’s my favorite ornament; maybe because of the copper color and when I was 5 I imagined it was like an expensive gold piece.  Or maybe it was the first Christmas ornament that I made and got to hang on our Christmas tree.  Or maybe it’s the flood of memories that it brings.  I don’t know exactly why but I absolutely love that ornament.  I hope that the ornament lasts for another 25+ years.

 
Merry Christmas Everyone, I hope that this Christmas brings joy beyond all imagine and all your dreams to come true.  What is your favorite ornament?  What kinda of memories does your ornament bring?


Thursday, October 18, 2012

Start Writing Your Story...

Good Evening Everyone!!!  I hope that everyone’s week is going well.  I’ve kinda of had a rough week this week however; it’s going to be Friday and as the song says “…I’m working for the weekend!”
So let’s get to the heart of this post shall we.  So I weighed in at Weight Watchers this Tuesday.  I was down exactly 2 lbs.  So what does this mean…(drum roll please)  I am 1.2 lbs away from a total weight loss of 90 lbs.  I cannot believe that I have made it this far.  Man, prayer and that jaw wiring procedure was so worth it (just joking about that last part).  So my current weight is 164.6.  I have a few more pounds (about 14) until I’m at Weight Watchers goal weight.  I’m not too sure if I want to get that low but I’m saying now, where ever my body decides to take me then I will follow.  So I wanted to discuss something that recently came up during conversation with a fellow Weight Watcherer (I’m not too sure how to spell or say that but I like how is sounds).  We were discussing weight loss and the struggles that go with it etc etc.
So this is what I have determined is the root of my struggle with weight.  I am addicted to feeling full or being stuffed to the brim.  I love that sensation of constantly feeling full, like I can’t eat one more bite or I am going to be sick kinda of feeling.  I’m not too sure if this makes any sense to anyone else or if anyone has or is struggling with this.
A few years ago, I was going through some self discovery and I was trying to figure out the root of my overweightness and it hit me like a ton of bricks one night.  I was eating to the point of being sick and then as soon as the feeling or sensation passed, I was going back to the kitchen and getting something else to bring back that feeling.  I would eat whatever it was and then a half an hour or hour later I was back up going into the kitchen finding whatever else I could find to bring back that feeling.  I was and still am addicted to feeling full/stuffed. 
So recently (this past week) I was realizing that I was still doing the same thing.  Even though it might not be with horrible, fatting foods, I am still doing it.  I notice that the night time is the worst for me, probably out of boredom or just trying to deal with the stress of what the day has brought me.  My hope and prayer is that I am trying to recognize this more in so that I can start getting this part of my life under control.  I have the working out, the right food choice etc under control, but I surely do not have this part under control.   At times it can be so frustrating and make me so angry because I can not understand why I can’t control this aspect of my life.  I sometimes am yelling at myself as I am eating “Kim, get a grip, take control, you don’t need this!!  You are ruining all the hard work that you have accomplished.” 
So why am I bringing this up to you guys.  Well of course, my hope is that if I am open and honest about my weight loss and struggles that it might help someone with whatever situation that they are currently going through.  I used to tell people that I was addicted to food or I really liked eating (wasn’t it obvious) but I really didn’t take time to look at what was really going on; what the root of the problem really was.
So this is what I ask of my fellow readers and friends.  Take a moment when you have some time to yourself (my best time is when I am driving) and start examining your life.  If you are struggling with eating and weight loss or weight gain or whatever other aspect of your life that you don’t like and try to figure out what is the root of the problem.  This might take a while to come up with.  It is so hard for us to do self examination but I firmly believe that once you can get to the root of the problem, then your struggle will become so much more manageable and you can become so much more successful with whatever your struggle is.    Don’t just state the obvious…”oh my weight gain is because I really like food, duh!”  It might be but everyone that I have talked that has struggled with weight there has always been something more to the story.  Well, take some time and start writing that story and see what you come up with.  You are sooooo worth it, believe me.  Just try and start today or tomorrow and see what you come up with.  You might think it is pointless or who cares.  Well, again you are not pointless, you were made for a purpose and I do care!!  Start writing it down and see what happens. 
So enough of the mushy stuff, I hope that each and every one of you is doing well.  Please let me know if you have any questions, comments or any feedback would be great.  I hope that you guys like what I’m posting.  Please feel free to comment any ideas or suggestions that you are looking for.  I’m hoping to have a dear friend of mine guest blog soon.  She is fabulous and someone that I really look up to about weight loss and life in general. 
Oh, this weekend I will be posting a recipe that came from my dear friend’s mother.  It is a low point breakfast item that is fabulous and sure to please anyone.
Wishing you well,
Kim